As you can see in the final video our finished animation needed a little bit more work, I'm proud to have completed it but after getting used to the product I would of liked another go at it with some minor tweaks. My group consisted of me, Keyleigh Quinn and Andrea Egelstaff , my job was that of sorting out the sound and narration for the story, Keyleigh was in charge of filming and was helped by Andrea who also created all the clay models. Our concept is based on the story of the hungry caterpillar. The video was very similar to the Wallace and Gromit clay animation I have mentioned previously. The only character in the video is the caterpillar who eventually turns into a butterfly. The set we finally settled on was one of the pre made ones with a jungle themed background to keep in line with the outdoor theme. The caterpillars main theme is on the journey to changing into a beautiful butterfly. To make animation more believable I decided to use various stock sounds from Zu3d its self including a munching sound to show him eating, and a background countryside sound effect to make it more realistic. The only background music we used was for a little section whilst he's moving over a large section of food as a filler and for the end credits, both of these again we found on the sound effects section of Zu3d. The main issues we had with this project were lighting and the clay not sticking together correctly. to resolve these next time we would film all in one day and feed a wire through the caterpillar to keep it more rigid.
Showing posts with label Zu3d. Show all posts
Showing posts with label Zu3d. Show all posts
Friday, 30 January 2015
Our Finished Animation!!!!!!
As you can see in the final video our finished animation needed a little bit more work, I'm proud to have completed it but after getting used to the product I would of liked another go at it with some minor tweaks. My group consisted of me, Keyleigh Quinn and Andrea Egelstaff , my job was that of sorting out the sound and narration for the story, Keyleigh was in charge of filming and was helped by Andrea who also created all the clay models. Our concept is based on the story of the hungry caterpillar. The video was very similar to the Wallace and Gromit clay animation I have mentioned previously. The only character in the video is the caterpillar who eventually turns into a butterfly. The set we finally settled on was one of the pre made ones with a jungle themed background to keep in line with the outdoor theme. The caterpillars main theme is on the journey to changing into a beautiful butterfly. To make animation more believable I decided to use various stock sounds from Zu3d its self including a munching sound to show him eating, and a background countryside sound effect to make it more realistic. The only background music we used was for a little section whilst he's moving over a large section of food as a filler and for the end credits, both of these again we found on the sound effects section of Zu3d. The main issues we had with this project were lighting and the clay not sticking together correctly. to resolve these next time we would film all in one day and feed a wire through the caterpillar to keep it more rigid.

Tuesday, 27 January 2015
The Making Of The Hungry Caterpillar
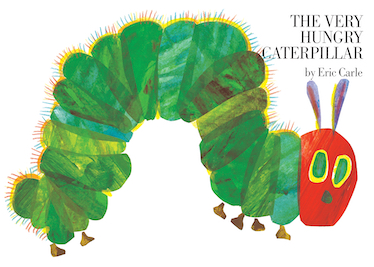
So after much delegation within my group we have decide to create our animation around the story of the hungry caterpillar, a book written by Eric Carle. The story follows a hungry caterpillar who spends a week eating as many things as he can. It's a light hearted story perfect for children. I thought it would be a nice touch to make Eric Carle aware of what we were doing so I left him a message on his personal website.

We are going to go with a Wallace and Gromit approach and make all of our characters and props out of clay and then slowly change them to create the impression of movement.

Here are some of our characters, and the food the caterpillar was going to indulge in. Here is a picture of a full sept up ready for filming.

As you can see we have used Zu3d a program designed for making animations in primary school. We have used the ipad version, and through this we will do all our filming and editing and then will upload it to youtube. Once we have finished filming, I will then edit in the sound again using the software provided in Zu3d.

The record feature on the program was especially helpful as this allowed us to do everything through the ipad its self and didn't have to keep chopping and changing between ipad and computer. As well as this Zu3d has a large array of sound effect features.

Over all Zu3d was a really useful package and really helped us when completing our final animation.
Stop Motion an introduction
So here's a brief history on stop motion filming. It is first credited to be invented by Albert E Smith and J Staurt Blackton for the film The Humpty Dumpty Circus. Blackton also went on to do The Haunted Hotel in 1907. It then went from strength to strength and has been used in a great many motion pictures including the AT AT walker scene in Star Wars shown below.
The biggest household name when it comes to stop motion is defiantly Wallace and Gromit. When it comes to clay animation Nick Park is definitely the leading expert. Wallace and Gromit produces Aardman are a truly British company and are still based in the UK.
Aardman studios
So how is it all filmed? After detailed storyboarding, set and plasticine model construction, the movies are shot one frame at a time, moving the models of the characters slightly to give the impression of movement in the final film. It's a pain staking process and takes huge amounts of time.
The biggest household name when it comes to stop motion is defiantly Wallace and Gromit. When it comes to clay animation Nick Park is definitely the leading expert. Wallace and Gromit produces Aardman are a truly British company and are still based in the UK.
Aardman studios
So how is it all filmed? After detailed storyboarding, set and plasticine model construction, the movies are shot one frame at a time, moving the models of the characters slightly to give the impression of movement in the final film. It's a pain staking process and takes huge amounts of time.
Making a thaumatrope
In lectures today we were introduced to the amazing world of thaumatropes I learned that not only is it a nightmare to spell but they are a nightmare to make as well. Here's a step by step guide on how to create one for yourself.
- Cut out the two thaumatrope patterns you've designed
- Carefully glue the two halves together matching the two holes near the edge.
- Punch a hole in each of the two small circles on the thaumatrope.
- Attach a rubber band in each hole as shown below.
- Your thaumatrope is complete! Hold the strings between your fingers and twist them to wind up the toy. Let it unwind quickly and watch the two pictures merge into one.
Just In case yours doesn't work here's a video of one that does.
I first encountered this toy in the film sleepy hollow here's the scene.
Subscribe to:
Posts (Atom)